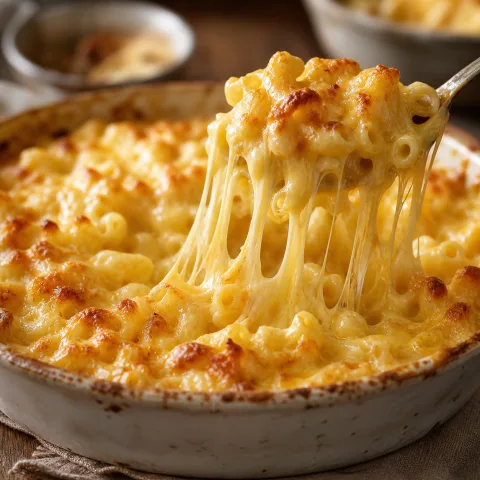
01 / FROM A PHOTO TO A RECIPE
How to use a screenshot recipe converter in Hireci
Start with one image that shows the complete recipe text. A screenshot recipe converter reads the words in the photo and organizes them into ingredients and directions. What it cannot do is read what the camera could not see — glare, blur and cropped edges all become gaps you have to fill by hand.
Choose a screenshot with the full recipe text
Open the image and read it yourself first. Every ingredient, amount and step should be visible and legible. If the text is cut off at the edges or buried under screen clutter, crop the photo down to just the recipe before you continue.
Import the photo into Hireci
In Hireci’s add-recipe menu, choose Import from photos and select the image from your library. Import one screenshot per recipe — mixing two dishes in one import makes the result harder to untangle.
Extract the recipe text
Tap Analyze recipe. When the import finishes, open the recipe and check what came through: its title, ingredients, directions and available source information. A misread amount is the most common problem, and the review checklist below shows where to look.
Review, edit and save the result
Hold the original screenshot next to the converted recipe and compare line by line. In Hireci, open the … menu, choose Edit recipe, correct the text, then tap Save. The worked example below shows how to handle a typical recipe-card screenshot.
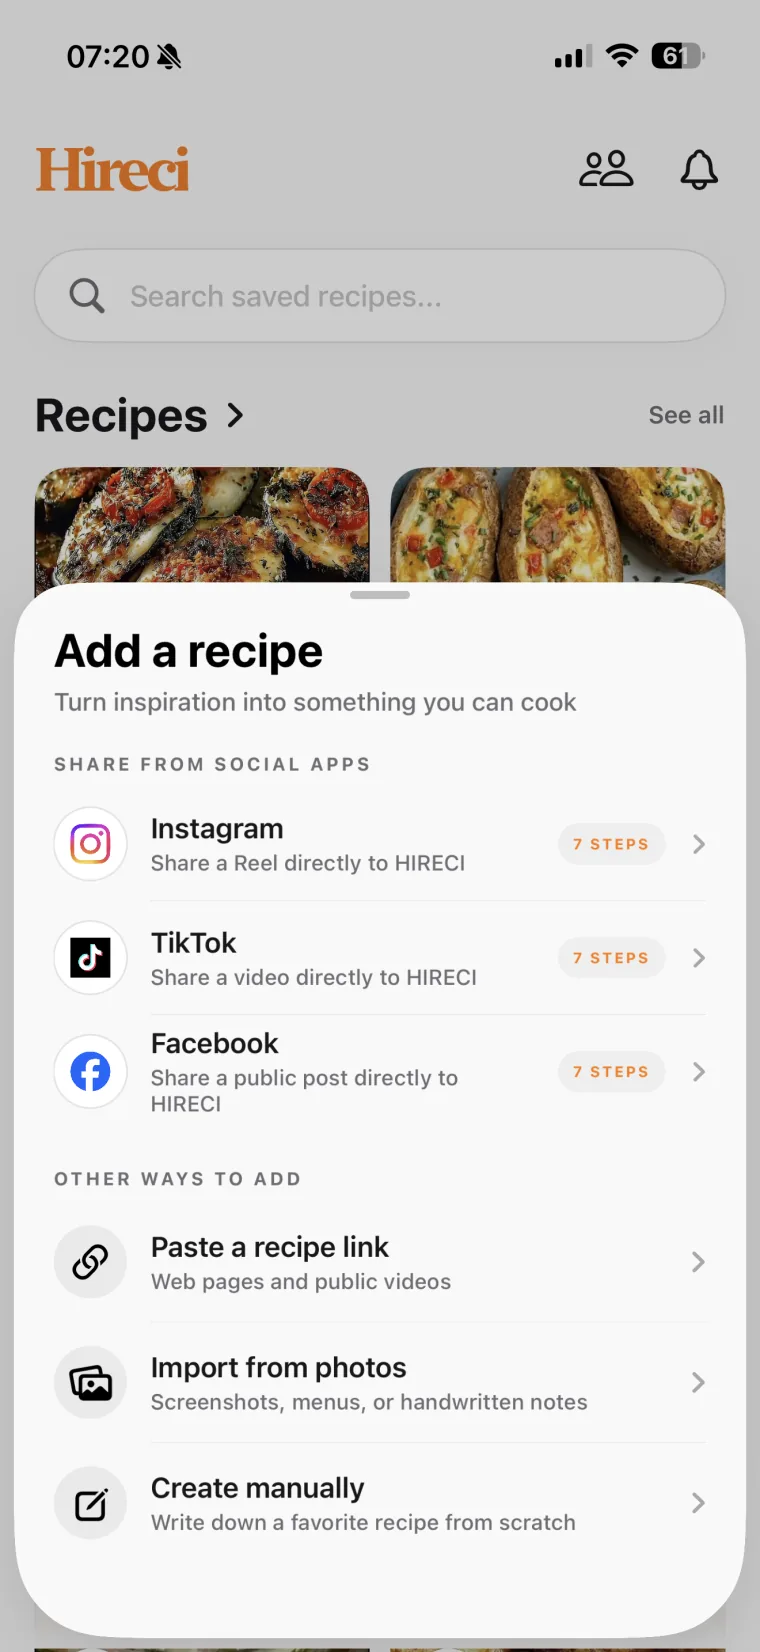 Choose Import from photos
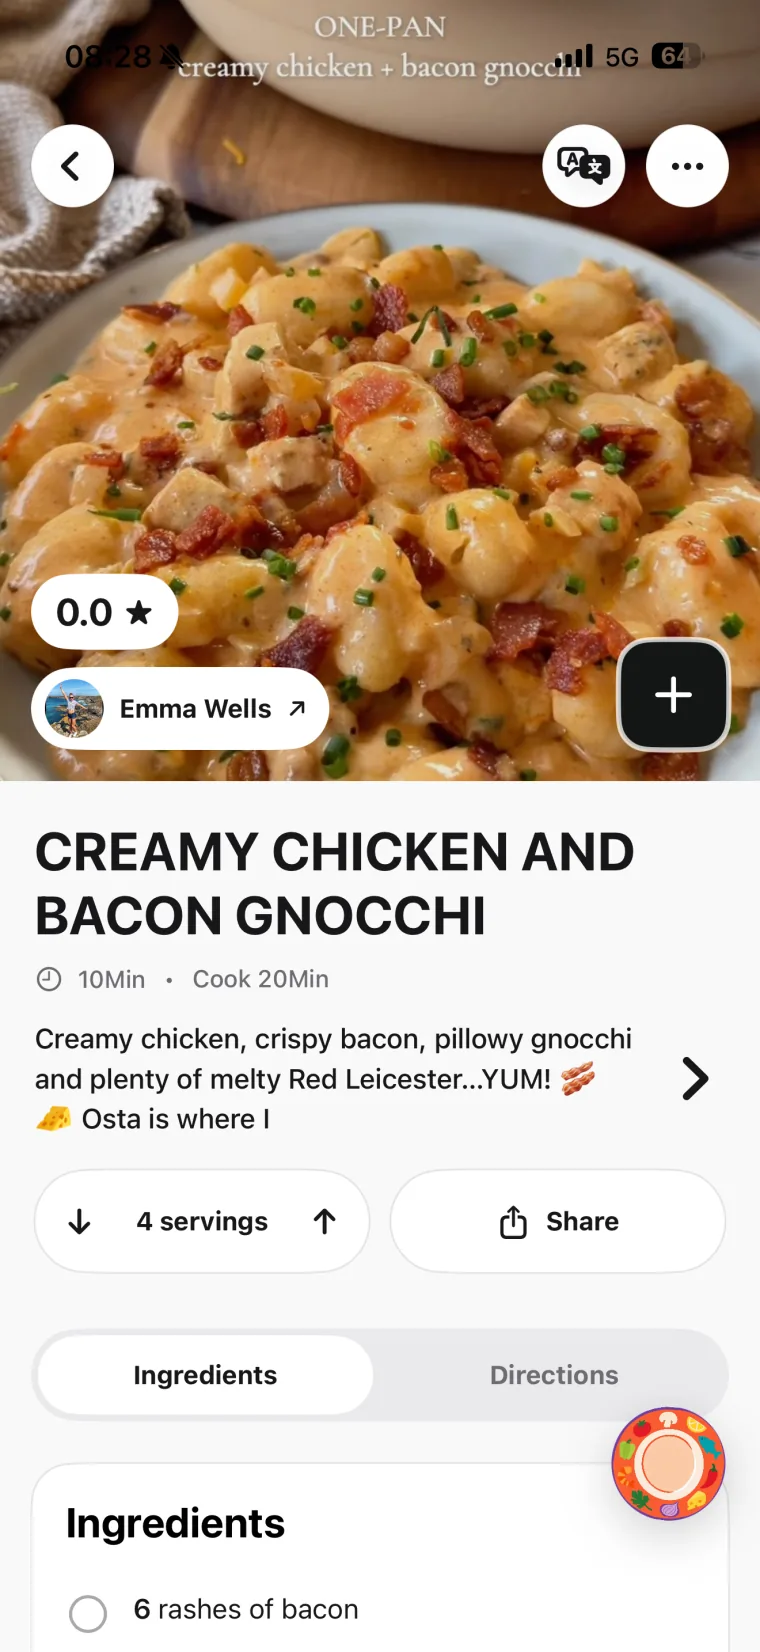 Open and review the recipe
Crop before you import
Use your phone’s photo editor to crop the screenshot down to the recipe text before importing. Cut out notifications, captions, comments and other screen clutter. Less noise around the text means fewer misread lines to fix later.
02 / A WORKED EXAMPLE
Turn a recipe-card screenshot into a written recipe
A recipe card image usually lists ingredients first and keeps the method short. Read the whole image before importing, and decide which lines are ingredients, which are steps, and which are just decoration.
Original teaching example, not a real screenshot or an actual import. It illustrates how to organize information you have checked.
DETAILS IN THE SCREENSHOT
Overnight oats
- Printed ingredient list: ½ cup rolled oats, ½ cup milk, ¼ cup Greek yogurt, 1 tbsp honey, ½ tsp vanilla extract, a pinch of salt.
- Printed method: 1. Stir everything together in a jar. 2. Cover and refrigerate overnight. 3. Top with fruit before serving.
- Note at the bottom: Makes 2 jars.
ORGANIZED RECIPE
Overnight oats
Ingredients
- ½ cup rolled oats
- ½ cup milk
- ¼ cup Greek yogurt
- 1 tbsp honey
- ½ tsp vanilla extract
- A pinch of salt
Directions
- Stir everything together in a jar.
- Cover and refrigerate overnight.
- Top with fruit before serving.
Not specified: The exact chill time (“overnight” is the only timing given) and which fruit to use for topping. The recipe keeps those gaps visible.
Keep “makes 2 jars” with the recipe
In Edit recipe, record the yield — Makes 2 jars — in the recipe’s servings or notes field. This preserves what the amounts mean. Without the yield, “½ cup milk” is a number without a context.
Use Add ingredient or Add step for a verified detail that is missing. In this example, the fruit topping belongs in the ingredients too if you want it on the grocery list. Tap Save after editing, then reopen the recipe to check the order.
03 / READ WHAT THE CAMERA READ
Check the details a screenshot conversion can misread
Text recognition is only as good as the image. Compare the extracted recipe with the original photo line by line, and pay special attention to the characters and layouts that get misread most often.
| Detail | What to check | What to keep in your recipe |
|---|---|---|
| Image clarity | Straight-on, sharp, no glare or shadows over the text. | Only convert images you can read yourself. |
| Cropped edges | Text cut off at the borders, especially amounts at line ends. | The full text — recrop and reimport if anything is cut. |
| Look-alike characters | 1 vs l, 0 vs O, ½ vs 1/2, commas vs periods in amounts. | Amounts you have verified against the image. |
| Handwriting | Cursive and stylized lettering are often misread. | Corrections typed in by hand via Edit recipe. |
| Layout quirks | Two columns, wrapped lines, notes squeezed into margins. | Ingredients and steps in the right fields, in order. |
| Steps the image skips | A single ingredient screenshot may have no method at all. | Gaps left visible until you find the full recipe. |
If the image never shows a quantity, temperature or step, check the original source for the full recipe before relying on that detail. Do not let a confident-looking extraction turn a guess into an instruction.
04 / FIX THE IMAGE, NOT THE RECIPE
Fix screenshot imports and incomplete conversions
The screenshot is blurry or has glare
Choose a sharper image: straight-on, even light, no reflections. A screenshot taken directly on your phone usually beats a photo of another screen. Reimport the better image rather than repairing a bad extraction line by line.
Text is cut off at the edges
Recrop the photo so every line is fully visible, then import it again. Pay attention to amounts at line ends — a “1 tbsp” cut to “tbsp” reads as a missing amount.
Handwriting came through wrong
Correct the misread lines yourself in Edit recipe. For a recipe you cook often, it is worth retyping the corrected version once so you never have to check it again.
You have several screenshots of one recipe
Import each screenshot, then combine them: use Edit recipe to move the ingredients and steps into one recipe and delete the duplicates. One finished recipe per dish keeps your collection searchable.
The photo shows a finished dish, not text
A photo of food contains no method to extract. Find the written recipe behind it — the original post, video description or website — and import that instead.
05 / QUESTIONS BEFORE YOU CONVERT
Screenshot Recipe Converter FAQ
Does this page convert screenshots in the browser?
No. This page is a tutorial for Hireci on iPhone and iPad. The conversion happens inside the app: choose Import from photos, pick the screenshot and tap Analyze recipe. The illustration above shows the idea of the workflow.
What kind of screenshots work best?
Clear, straight-on images of printed recipe text with nothing cut off at the edges. Good light, sharp focus and a tight crop around the recipe give the cleanest extraction. Blurry, tilted or glare-covered photos need the most correction afterward.
Can Hireci read handwritten recipes?
Handwriting is often misread, especially cursive or stylized lettering. Import the photo and compare every line with the original, then correct the mistakes by hand in Edit recipe. For a recipe you cook often, retyping the corrected version once saves you checking it every time.
Can I combine several screenshots into one recipe?
Yes. Import each screenshot as its own recipe, then use Edit recipe to move the ingredients and steps into one of them and delete the duplicates. One finished recipe per dish keeps your collection searchable.
Should I crop the screenshot first?
Yes. Crop the image down to just the recipe text before importing — cut out notifications, captions, comments and other screen clutter. Less noise around the text means fewer misread lines to fix later.
What if the screenshot has no amounts or steps?
Keep what is there and leave the gaps visible. An ingredient screenshot without a method is still worth keeping as a starting point — find the full written recipe from the same source and add the missing steps through Edit recipe rather than guessing them.
Hireci is an independent app.